Now we’ll explain another method of the translation process using the Loco Translate plugin. This plugin is free and an excellent tool for translation management.
Install Loco Translate Plugin
- Go to Plugins > Add New page.
- Search for Loco Translate and click Install Now.
- Click on Activate when installation is done.
Translating The Theme Strings
- Go to Loco Translate > Themes page.
- Click on Lifeshine from the theme list.
- Click on New Language from Themes / Lifeshine page.
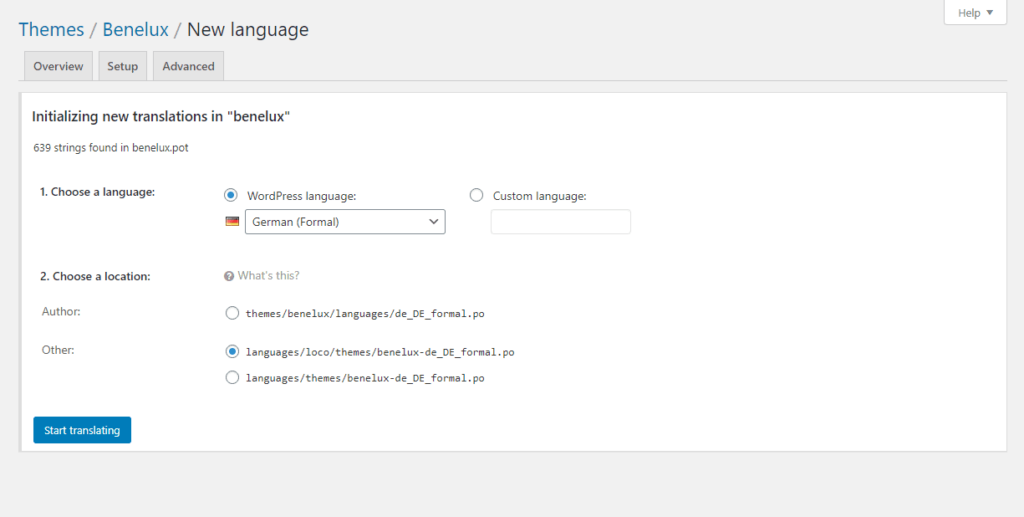
- In the new language configuration section, select your language from the Choose a language field, and choose languages/loco/themes/*.po or languages/themes/*.po path in Choose a location section, and then click on Start translating.

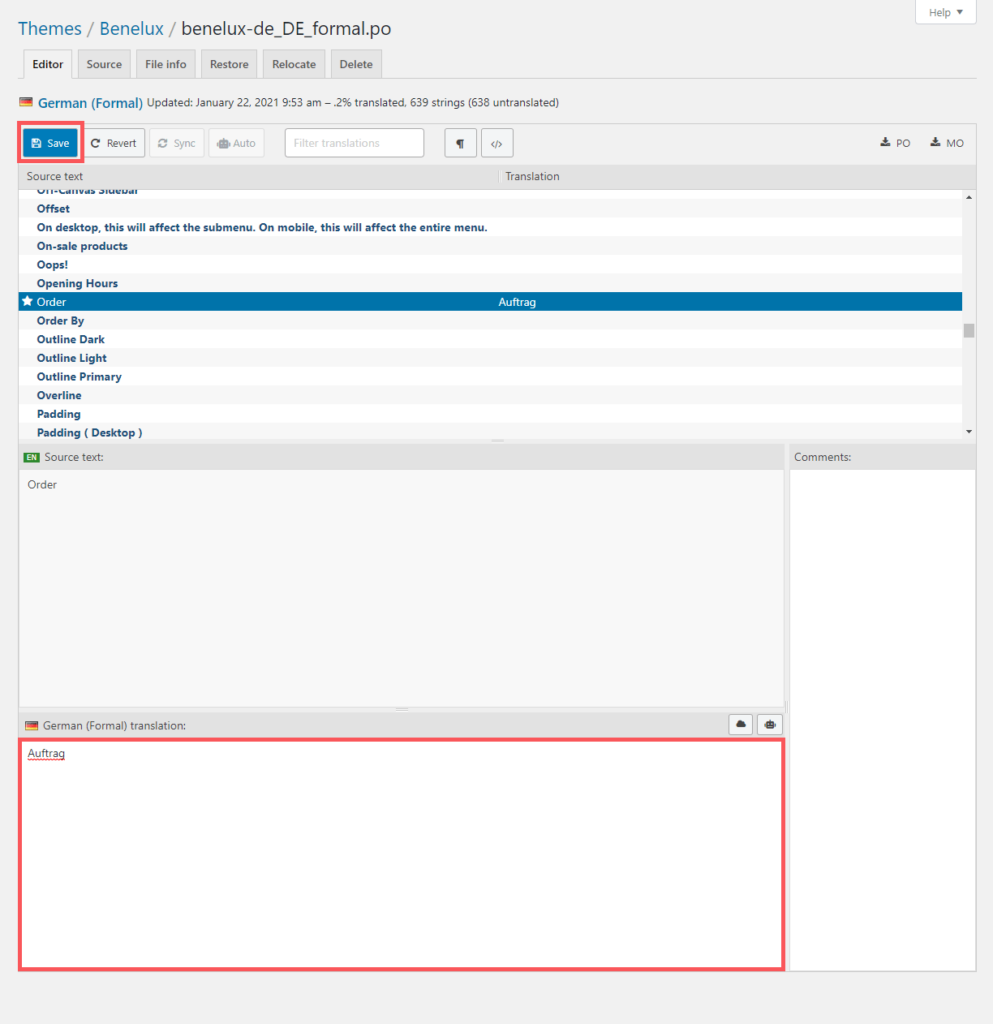
- In the translation editor page, search for a string you want to translate and type its translation in your language under the translation section. Do the same for other strings and then click on Save.

- Go to Settings > General page and select your Site Language, click Save Changes and check the result.
Note: If you noticed some translations are not working as expected after theme update, click on the Sync button in the translation edit screen. This option will sync the old translations with new translations.